Out of the box the Arduino IDE does not support multi-tasking effectively. the good news its easy to add support via a library to the Arduino IDE
Most operating systems appear to allow multiple programs or threads to execute at the same time. This is called multi-tasking. In reality, each processor core can only be running a single program at any given point in time. A part of the operating system called the scheduler is responsible for deciding which program to run when, and provides the illusion of simultaneous execution by rapidly switching between each program.
The scheduler in a Real Time Operating System is designed to provide a predictable execution pattern. Traditional real time schedulers, such as the scheduler used in FreeRTOS, achieve determinism by allowing the user to assign a priority to each thread of execution. The scheduler then uses the priority to know which thread of execution to run next. In FreeRTOS, a thread of execution is called a Task.
Installation
The following is for later versions of the Arduino IDE that support importing
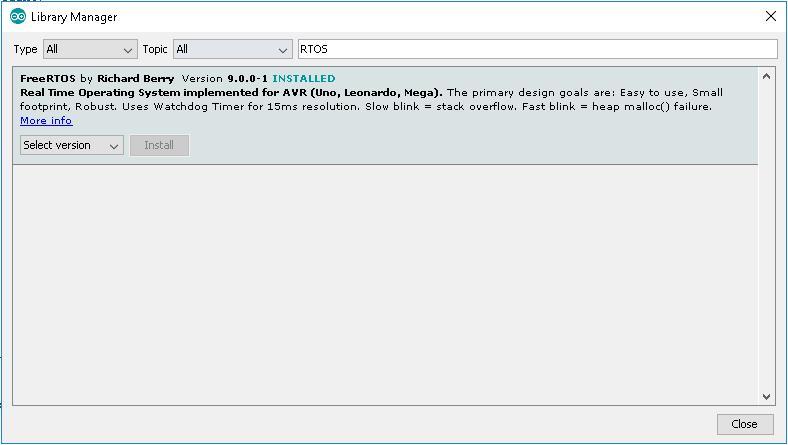
Navigate to Sketch -> Include Library -> manage Libraries
Type in RTOS and Install the FreeRTOS library
Here is a screenshot of the Library Manager – you can see I have installed the library
Hardware
I decided to use the Easy Module shield as it has many analog inputs and digital outputs, so for a basic example its easy to use some of these. The FreeRTOS library does come with a couple of built in examples, this example will be similar
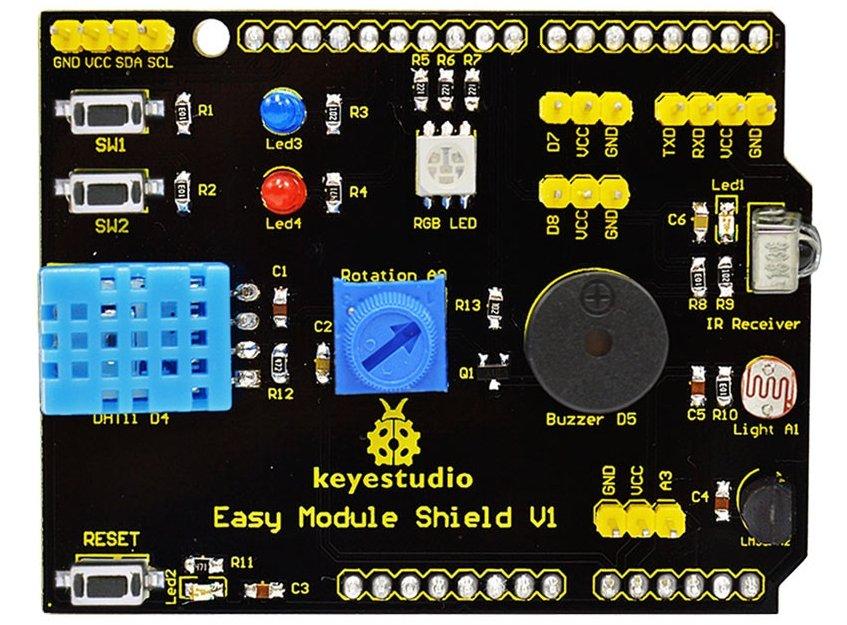
I will blink the red LED and take readings from the LDR and the pot on the board. Here is a FreeRTOS example, now this is probably overkill for something as basic as this but it gives you an idea of a fairly simple example.
In the real world working with microcontrollers, RTOS are popular so it doesn’t do any harm learning in a nice easy environment like the Arduino
Code
[codesyntax lang=”cpp”]
#include <Arduino_FreeRTOS.h>

// define three tasks for Blink & LDR & VR
void TaskBlink( void *pvParameters );
void TaskLDR( void *pvParameters );
void TaskVR( void *pvParameters );

// the setup function runs once when you press reset or power the board
void setup()
{

  // initialize serial communication at 9600 bits per second:
  Serial.begin(9600);

  // Now set up two tasks to run independently.
  xTaskCreate(
    TaskBlink
    ,  (const portCHAR *)"Blink"   // A name just for humans
    ,  128  // This stack size can be checked & adjusted by reading the Stack Highwater
    ,  NULL
    ,  3
    ,  NULL );


  xTaskCreate(
    TaskVR
    ,  (const portCHAR *) "VR"
    ,  128  // Stack size
    ,  NULL
    ,  2  // Priority
    ,  NULL );

  xTaskCreate(
    TaskLDR
    ,  (const portCHAR *) "LDR"
    ,  128  // Stack size
    ,  NULL
    ,  1  // Priority
    ,  NULL );

}

void loop()
{
  // Empty. Things are done in Tasks.
}

/*---------------------- Tasks ---------------------*/

void TaskBlink(void *pvParameters)  // This is a task.
{
  (void) pvParameters;


  // initialize digital LED_BUILTIN on pin 13 as an output.
  pinMode(12, OUTPUT);

  for (;;) // A Task shall never return or exit.
  {
    digitalWrite(12, LOW);   // turn the LED on
    Serial.println("LED 12 on");
    vTaskDelay( 1000 / portTICK_PERIOD_MS );
    digitalWrite(12, HIGH);    // turn the LED off
    Serial.println("LED 12 off");
    vTaskDelay( 1000 / portTICK_PERIOD_MS );
  }
}

void TaskLDR(void *pvParameters)  // This is a task.
{
  (void) pvParameters;


  for (;;)
  {
    // read the input on analog pin 1:
    int sensorValue = analogRead(A1);
    // print out the value you read:
    Serial.print("LDR value = ");
    Serial.println(sensorValue);
    vTaskDelay(20);  // one tick delay (300ms) in between reads for stability
  }
}

void TaskVR(void *pvParameters)  // This is a task.
{
  (void) pvParameters;


  for (;;)
  {
    // read the input on analog pin 0:
    int sensorValue = analogRead(A0);
    // print out the value you read:
    Serial.print("VR value = ");
    Serial.println(sensorValue);
    vTaskDelay(20);  // one tick delay (300ms) in between reads for stability
  }
}
[/codesyntax]
If you open the Serial monitor you will be able to read the debug strings, adjust the pot, cover the LDR to change the values
