In this article we look at creating and displaying custom characters on an I2C 16×2 LCD to an Arduino, we chose an Arduino Uno but there is no reason this will not work with a different Arduino board.
This can be useful if you want to display non standard characters on an LCD
In this example we will show you the website where you can create your own custom characters, how to connect the I2C LCD and the code example
Parts Required
| Name | Link |
| Arduino Uno | Aliexpress link |
| I2C lCD | |
| Connecting cables | Aliexpress product link |
Schematic/Connection
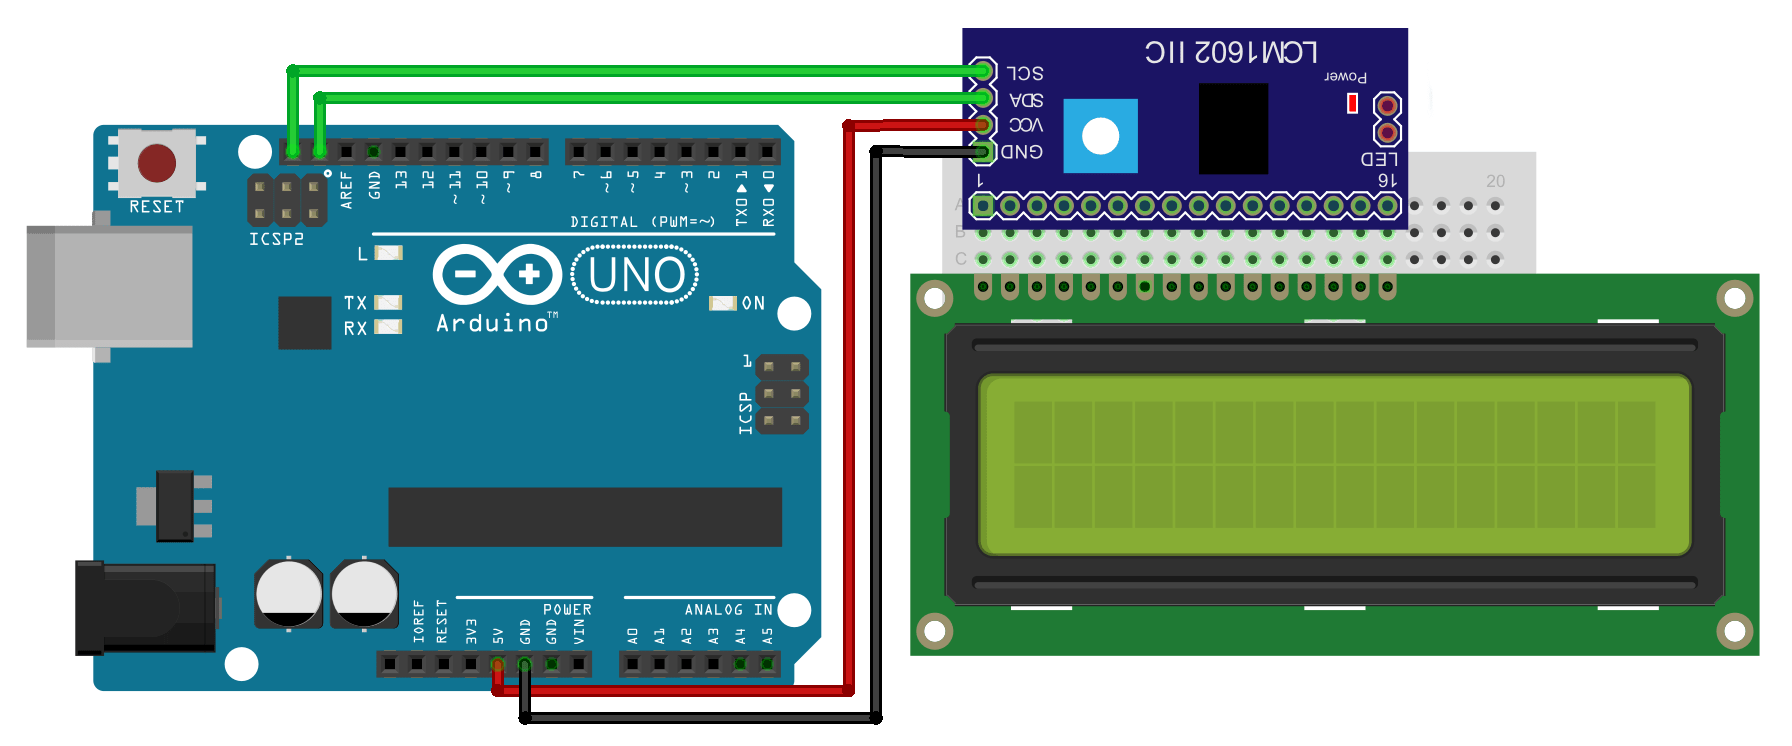
To connect the display to your Arduino requires just 4 wires, you just need to wire the Vcc and GND PINs from display to 5v and the GND PIN of the Arduino Uno, then SDA and SCL PINs from the module to the SDA and SCL PIN on your Arduino
Here is a layout in fritzing to show this connected to an Arduino Uno
Character generation
You can visit https://maxpromer.github.io/LCD-Character-Creator/
On that site there is an interactive character generator where you can fill in the individual boxes and you can create your own special character. There are a couple of settings to change, In the interfacing option select I2C and in the data type option select hex
You can see this in the screenshot, along with the character I designed for this example
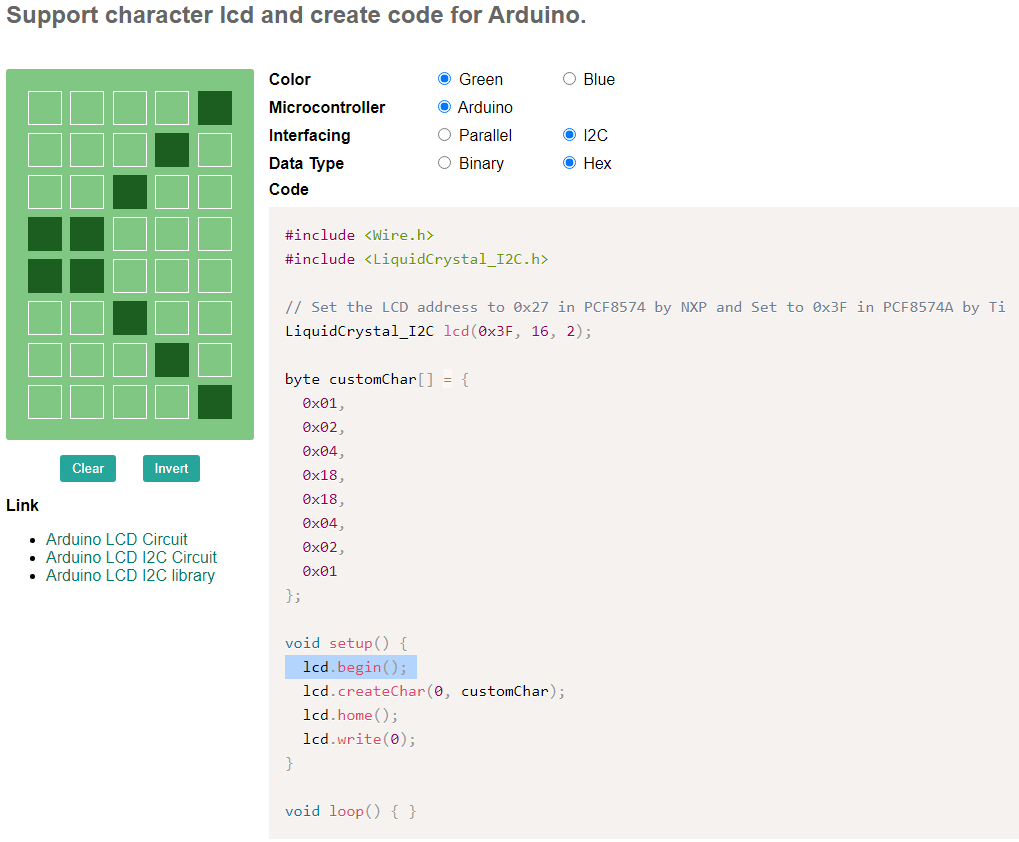
Note the generated code seems to be incorrect – the lcd.begin(); caused issues for me, see the code below which worked for me
Code Example
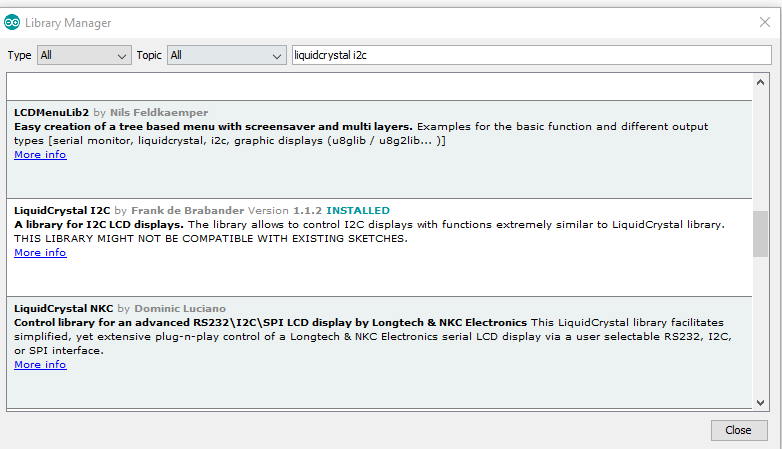
You need to add the Liquidcrystal I2C library by Frank De Brabander – other may work with some modifications but this is the one I used. Sketch – Include Library – Manage Libraries
[codesyntax lang=”cpp”]
#include <Wire.h>
#include <LiquidCrystal_I2C.h>

// Set the LCD address to 0x27 in PCF8574 by NXP and Set to 0x3F in PCF8574A by Ti
LiquidCrystal_I2C lcd(0x27, 16, 2);

byte customChar[] = {
  0x01,
  0x02,
  0x04,
  0x18,
  0x18,
  0x04,
  0x02,
  0x01
};

void setup()
{
  lcd.init();
  lcd.backlight();
  lcd.createChar(0, customChar);
  lcd.home();
  lcd.write(0);
}

void loop() { }
[/codesyntax]
Links
