In this example we connect a PCT2075 temperature-to-digital converter from nxp to an Arduino Uno
First lets look at some information about the sensor from the manufacturer
The PCT2075 is a temperature-to-digital converter featuring ±1 °C accuracy over ‑25 °C to +100 °C range. It uses an on-chip band gap temperature sensor and Sigma-Delta A‑to‑D conversion technique with an overtemperature detection output that is a drop-in replacement for other LM75 series thermal sensors.
The device contains a number of data registers: Configuration register (Conf) to store the device settings such as device operation mode, OS operation mode, OS polarity and OS fault queue; temperature register (Temp) to store the digital temp reading, set-point registers (Tos and Thyst) to store programmable overtemperature shutdown and hysteresis limits, and programmable temperature sensor sampling time Tidle, that can be communicated by a controller via the 2-wire serial I²C-bus Fast-mode Plus interface.
The PCT2075 also includes an open-drain output (OS) which becomes active when the temperature exceeds the programmed limits. The OS output operates in either of two selectable modes: OS comparator mode or OS interrupt mode. Its active state can be selected as either HIGH or LOW. The fault queue that defines the number of consecutive faults in order to activate the OS output is programmable as well as the set-point limits.
The PCT2075 can be configured for different operation conditions. It can be set in normal mode to periodically monitor the ambient temperature, or in shut-down mode to minimize power consumption.
The temperature register always stores an 11-bit two’s complement data, giving a temperature resolution of 0.125 °C. This high temperature resolution is particularly useful in applications of measuring precisely the thermal drift or runaway. When the device is accessed the conversion in process is not interrupted (that is, the I²C-bus section is totally independent of the Sigma-Delta converter section) and accessing the device continuously without waiting at least one conversion time between communications will not prevent the device from updating the Temp register with a new conversion result. The new conversion result will be available immediately after the Temp register is updated. It is also possible to read just one of the temperature register bytes without lock-up.
The PCT2075 powers up in the normal operation mode with the OS in comparator mode, temperature threshold of 80 °C and hysteresis of 75 °C, so that it can be used as a stand-alone thermostat with those pre-defined temperature set points. The default set points can be modified during manufacture and ordered under custom part number.
There are three selectable logic address pins with three logic states so that 27 8-pin devices or three 6-pin devices can be connected on the same bus without address conflict.
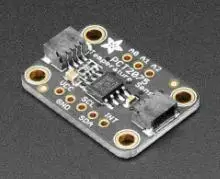
This is the sensor that I bought
Parts Required
Here are the parts I used
The sensor you can pick up in the $6 price range – you can connect to the sensor using a standard header the classic dupont style jumper wire.
I used a Qwiic cable – since a few sensors seem to use these but this is optional
| Name | Link |
| Arduino Uno | UNO R3 CH340G/ATmega328P, compatible for Arduino UNO |
| PCT2075 | PCT2075 Temperature Sensor – STEMMA QT / Qwiic |
| Connecting wire | Free shipping Dupont line 120pcs 20cm male to male + male to female and female to female jumper wire |
| sensor shield | Expansion IO Board Sensor Shield |
Schematic/Connection
I used the Adafruit sensor and in this case used the Stemma connection
For the STEMMA QT cables, it uses the Qwiic convention:
Black for GND
Red for V+
Blue for SDA
Yellow for SCL
So color coded for ease of use
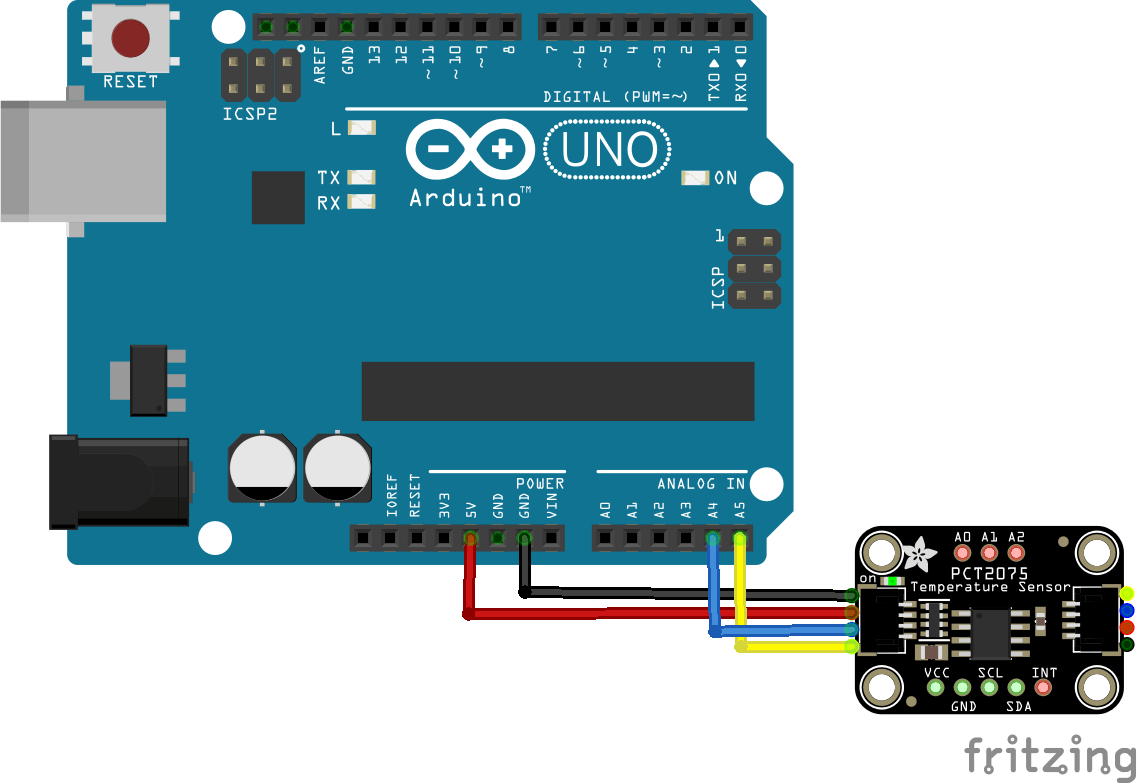
arduino and PCT2075
Code Example
This example uses a couple of libraries, both of which can be installed using the library manager
You need the Adafruit library for the PCT2075 from https://github.com/adafruit/Adafruit_PCT2075
You also need an I2C support library from the same folks for the library above to work and that is available from – https://github.com/adafruit/Adafruit_BusIO
This is the simple test example
[codesyntax lang=”cpp”]
#include <Adafruit_PCT2075.h>


Adafruit_PCT2075 PCT2075;

void setup() {
  PCT2075 = Adafruit_PCT2075();

  Serial.begin(115200);
  // Wait until serial port is opened
  while (!Serial) { delay(1); }
  Serial.println("Adafruit PCT2075 Test");

  if (!PCT2075.begin()) {
    Serial.println("Couldn't find PCT2075 chip");
    while (1);
  }

  Serial.println("Found PCT2075 chip");

}

void loop() {
  Serial.print("Temperature: "); Serial.print(PCT2075.getTemperature());Serial.println(" C");
  delay(1000);
}
[/codesyntax]
Output
Here is what I saw in Serial monitor
Adafruit PCT2075 Test
Found PCT2075 chip
Temperature: 20.25 C
Temperature: 20.37 C
Temperature: 20.37 C
