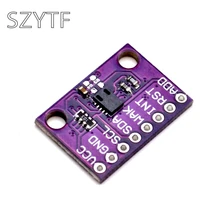
In this example we will connect a CCS811 gas sensor to an arduino, lets look at the sensor
CCS811 is a low-power digital gas sensor solution, which integrates a gas sensor solution for detecting low levels of VOCs typically found indoors, with a microcontroller unit (MCU) and an Analog-to-Digital converter to monitor the local environment and provide an indication of the indoor air quality via an equivalent CO2 or TVOC output over a standard I2C digital interface.
Features
Integrated MCU
On-board processing
Standard digital interface
Optimised low power modes
IAQ threshold alarms
Programmable baseline
2.7mm x 4.0mm LGA package
Low component count
Proven technology platform
Specs
| Interface | I²C |
|---|---|
| Supply Voltage [V] | 1.8 to 3.6 |
| Power Consumption [mW] | 1.2 to 46 |
| Dimension [mm] | 2.7 x 4.0 x 1.1 LGA |
| Ambient Temperature Range [°C] | -40 to 85 |
| Ambient Humidity Range [% r.h.] | 10 to 95 |
Parts List
| Amount | Part Type |
|---|---|
| 1 | CJMCU-811 CCS811 Air Quality Gas Sensor |
| 1 | UNO R3 CH340G/ATmega328P, compatible for Arduino UNO R3 |
Schematics/Layout
Remember and connect WAKE to gnd
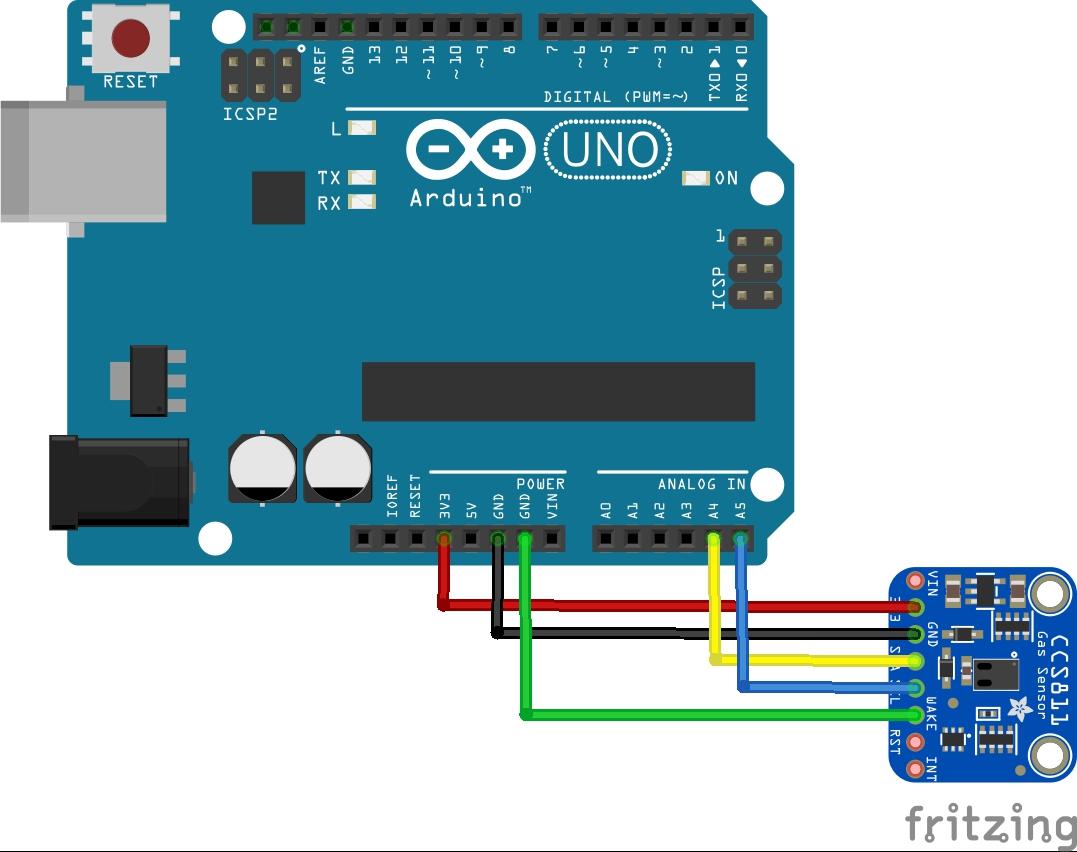
arduino and ccs811 layout
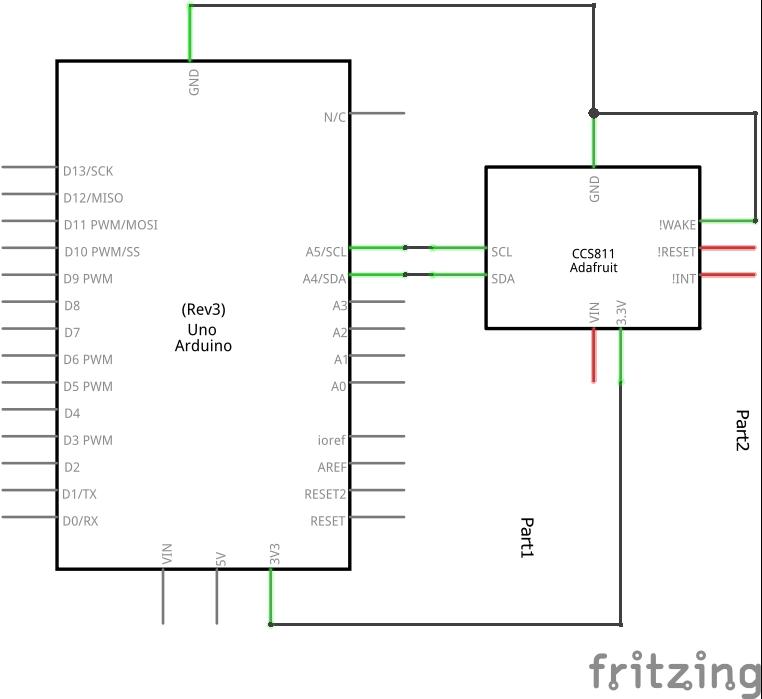
arduino and ccs811 schematic
Code
Again we use a library this is the adafruit one – you can use the library manager and add this.
And this is the out of the box example
[codesyntax lang=”cpp”]
#include “Adafruit_CCS811.h”
Adafruit_CCS811 ccs;
void setup() {
Serial.begin(9600);
Serial.println(“CCS811 test”);
if(!ccs.begin()){
Serial.println(“Failed to start sensor! Please check your wiring.”);
while(1);
}
//calibrate temperature sensor
while(!ccs.available());
float temp = ccs.calculateTemperature();
ccs.setTempOffset(temp – 25.0);
}
void loop() {
if(ccs.available()){
float temp = ccs.calculateTemperature();
if(!ccs.readData()){
Serial.print(“CO2: “);
Serial.print(ccs.geteCO2());
Serial.print(“ppm, TVOC: “);
Serial.print(ccs.getTVOC());
Serial.print(“ppb Temp:”);
Serial.println(temp);
}
else{
Serial.println(“ERROR!”);
while(1);
}
}
delay(500);
}
[/codesyntax]
Output
Open the serial monitor – this is what I saw. The higher CO2 level was when I breathed on the sensor
CO2: 400ppm, TVOC: 0ppb Temp:28.28
CO2: 400ppm, TVOC: 0ppb Temp:47.75
CO2: 400ppm, TVOC: 0ppb Temp:25.00
CO2: 400ppm, TVOC: 0ppb Temp:26.49
CO2: 1228ppm, TVOC: 126ppb Temp:25.68
CO2: 575ppm, TVOC: 26ppb Temp:9.59
CO2: 400ppm, TVOC: 0ppb Temp:26.49
CO2: 400ppm, TVOC: 0ppb Temp:105.81
Video
In this video we import the library, we compile and program the Arduino and then we open the serial monitor. The higher reading is when I blew on the sensor
Links
CJMCU-811 CCS811 Air Quality Gas Sensor
